
not necessarily true; if you have a small enough focussed beam, you can use quite a high pulse rate. You would just need to reduce the power, you don't need the full metal-cutting multi-watt CO2 laser power to remove wood.
As for heat, true that locally lasers work by vaporizing surface material, but if you get a small enough beam this need not stress the surrounding matrix , since the heat transfer time for such a small beam can be pretty short and the overall power input to the wood can be made very small. The thing to consider is the overall power output in watts, which will probably be very small - that's what will tell you if you are putting too much heat into the wood or not.
However I do think the resulting interior finish would be too rough - not due to burning, but due to differential removal rates due to woodgrain, and due to the 'scan line' width of the laser (ever notice the 'etched' look of laser-engraved wood?).
All these things (except perhaps the 'woodgrain' problem) could be sorted with tighter beam focussing, overlapping scan patterns, and the right power input rate. The real problem is that since it's basically a line-of-sight vaporization tool, there is no way to "focus" the beam on a single 3-dimensional point, only a 2-D line, and so you don't know when to stop, i.e. you can't measure the penetration depth at the same time.
With 'laser holography' and a transparent 3-d medium you can use intersecting lasers to create a 3-d surface, but this can't be adapted to removal of 3-d opaque stock as far as I can see.
So - totally impractical but not for the reasons given above, IMO.
Bill
Sad or what?

-
BigDavy
- Posts: 4883
- Joined: Sat Dec 11, 2004 5:50 am
- Please enter the next number in sequence: 1
- Location: Larkhall Scotland
Cutting Methods
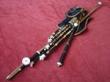
Nice Picture David.
If we into the realms of fantasy as you say David, why not use ultrasound?.
David
If we into the realms of fantasy as you say David, why not use ultrasound?.
David
Payday, Piping, Percussion and Poetry- the 4 best Ps
-
DMQuinn
- Posts: 166
- Joined: Wed Dec 18, 2002 6:00 pm
- Please enter the next number in sequence: 1
- Location: Scenic and historic Waterloo, NY.
Lasers? Water jets? Sounds like fun, guys. Let me know how it turns out.
The fellow I work with made a set of long twist bits with pilots ground at the tips, and these work splendidly for opening up a pilot bore. In that case, the guide is the tip and the body (or shoulder, I suppose) does the cutting, whereas for the bits I use, the body is the guide and the tip does the cutting.
Not on the little Atlas I use.Jumper wrote:South Bend lathes have a clutch on the longitudinal feed (which is separate from the half nuts used for screw-cutting), so a carriage stop on the ways will prevent such a collision (and allow unlimited reverie!). Not so on the Atlas or Myfords?DMQuinn wrote:Suppose you were to slip into a tea-induced reverie and missed the whoosh. What would give way first? The steady rest or the leadscrew chain?
That's true, as far as I can tell. I use a transitional tool. After drilling to the required depth with the larger drill, I follow with a tool which Bill has described: it has a body of the same diameter as the hole just drilled, and a short tip the same diameter as the next boring bit, ground to cut as a D bit. D bits are not great at starting holes, but in this configuration, the cutting bit is so short that there is no risk that the hole it starts will not be concentric. The D-bit grind is used because it is the simplest to achieve grinding freehand. You need to work up a bit like this for each step. Mine are all on 18" shanks.Not that I would encourage anyone to shift their focus away from the task at hand when working with whirling machinery, of course.
David, you have previously alluded to your preference for step-drilling tapered bore pilot holes from large to small. I understand some of the reasons for this; large-diameter drills are stiffer and thus bore a straighter hole than the small ones, and the smallest, most flexible bits are only required to make short cuts, rather than full-length ones.
But since gundrills are not self-centering, how do you maintain concentricity when drilling each smaller step? Without some sort of guidance near the cutting edge, the smaller bit has a tendency to follow the tangential edge of the larger hole, not the center.
The fellow I work with made a set of long twist bits with pilots ground at the tips, and these work splendidly for opening up a pilot bore. In that case, the guide is the tip and the body (or shoulder, I suppose) does the cutting, whereas for the bits I use, the body is the guide and the tip does the cutting.
-
djm

- Posts: 17853
- Joined: Sat May 31, 2003 5:47 am
- Please enter the next number in sequence: 1
- Location: Canadia
- Contact:
The purpose of using a laser would be to bore a dead straight pilot hole, not to actually do all the boring or to attain a finished bore. For this purpose a 1/16" hole should be fine. The roughness you point out should not be too big a problem. One of the factors for slow boring/reaming as I understand it is the concern with drift. If you already had a bore that you could be confident was dead straight (laser) then you would be able to proceed with reaming faster (obviously not too fast, as you would still have to be concerned with tear-out).billh wrote:However I do think the resulting interior finish would be too rough - not due to burning, but due to differential removal rates due to woodgrain, and due to the 'scan line' width of the laser (ever notice the 'etched' look of laser-engraved wood?).
The functions of focusing and timing you mention would require a much more sophisticated (read expensive) commercial laser unit than the cheap, second-hand units I was investigating in the $20K range. This would eliminate any cost benefits of using lasers, which was what lead me to look into lasers in the first place.
djm
I'd rather be atop the foothills than beneath them.
-
John Mulhern

- Posts: 154
- Joined: Sat Sep 08, 2001 6:00 pm
- Please enter the next number in sequence: 1
- Location: Riverside, CA
- Contact:
Marc, you're in the same boat with alot of us in not having the center distance to fully hold a gundrill in a tailstock (or carriage). Just make a small, close fitting bushing to fit in the stripped TS.I badly want one of these, but would I be wasting my money since I only have a midi lathe? I mean, if I can hand feed a D-bit through the tailstock, I should be able to do the same with a gun drill. Yes or No?
Marc

Re: the advantage of using a tailstock or carriage support over feeding by hand...dunno, I think the exit concentricity depends far more on that of the pilot hole than on how the drill's supported... those hollow tube bodies are quite flexy. If you're that concerned about TIR, you could always pilot drill the first 1" undersize & bore to gundrill dia. with a small HSS boring bar...but I think that's way overkill.
Re: Ebay... search "gundrill" as well as "gun drill"...lotsa stuff out there...unfortunately not always in the right dia. & length. I've been lucky in that most of my Ebay purchases have been new or like new...but an inexpensive fine green silicon carbide wheel on a bench grinder will easily touch them up, and a little Dykem on the tip will tell you if they aren't relieved sufficiently for clearance. Use a small hand held diamond hone afterward, if you really want to get fancy.
Yes...on Atlas lathes the warm amber glow, smoke & sparks are the signals that something is probably wrong.South Bend lathes have a clutch on the longitudinal feed (which is separate from the half nuts used for screw-cutting), so a carriage stop on the ways will prevent such a collision (and allow unlimited reverie!). Not so on the Atlas or Myfords?