Thanks again guys for the info - this is all so helpful.
I know from my previous instrument building experiences that getting the process "down" is the key to it. I'm imagining it's going to maybe take a year or more for me to refine all of the operations to a point where I'm happy with them. Certainly it took me longer than that with guitar building but I was truly starting from scratch then.
Another quick question if that's ok. I'm specifically thinking about whistles here but is the drilling of the bore sufficient or is there a more refined reaming process after that. I can see that there is with flutes from Terry's comments but I was wondering about this re whistles? Do you make the reamers on the lathe yourself? If so how?!
Making wooden whistles - a few questions
-
Geoffrey Ellis

- Posts: 585
- Joined: Thu Sep 13, 2012 1:15 pm
- antispam: No
- Please enter the next number in sequence: 8
- Tell us something.: Crafting fine quality folk flutes from around the world since 1997, my goal is to create beautiful instruments that have the best possible voice, tuning and response by mixing modern methods with traditional designs.
- Contact:
Re: Making wooden whistles - a few questions
With a whistle you won't need reamers unless you are doing a tapered bore. If you choose a gun drill of the correct diameter, that's all you'll need for the bore, and it will give you a better finish in the bore than a reamer will (at least that has been my experience). I can only imagine someone taking the trouble to make a reamer for a cylindrical bore instrument if they didn't have access to a source for gun drills of various sizes. You can get small gun drills (pre-owned) for very reasonable prices, and if you are only making small whistles you can get a selection of sizes if you want to experiment with bore diameters. Reamer manufacturing is a lot of work, but a worthy skill to develop if you are thinking of branching out to tapered bores.Gerry1 wrote: ↑Fri Dec 22, 2023 5:58 am Another quick question if that's ok. I'm specifically thinking about whistles here but is the drilling of the bore sufficient or is there a more refined reaming process after that. I can see that there is with flutes from Terry's comments but I was wondering about this re whistles? Do you make the reamers on the lathe yourself? If so how?!
There is a great thread on reamer making:
viewtopic.php?f=43&t=111018&hilit=reamers
-
Loren
- Posts: 8390
- Joined: Fri Jun 29, 2001 6:00 pm
- antispam: No
- Please enter the next number in sequence: 8
- Tell us something.: You just slip out the back, Jack
Make a new plan, Stan
You don't need to be coy, Roy
Just get yourself free
Hop on the bus, Gus
You don't need to discuss much
Just drop off the key, Lee
And get yourself free - Location: Loren has left the building.
Re: Making wooden whistles - a few questions
I’ll offer a slightly different perspective with regards to reaming (or not) for wooden whistle making and say, “it depends”.
A good gun drill, properly used, CAN yield a very straight, smooth bore. OTH, there are a few ways things can go sideways, so to speak, leaving you with less than optimal results.
Also, keep in mind that if you gun drill the bore to its final diameter and then the wood moves - bending/ovaling - and it will move, then what are you going to do to get back to spec? You can’t gun drill it again, can you? I was taught not to try, so perhaps it’s possible but typically when I was told not to try something in the shop it was for safety reasons. I imagine you could try using the gun drill itself as a reamer and ream by hand, though I’m not sure how well that would work since I’ve never tried that either, as a proper reamer was always available. Geoffrey? Terry? Bueller? Ever tried hand reaming with a gun drill?
Anyway, to continue, if you want to make quality whistles, the seasoning and working of the wood in stages is critical. As such, a good (proven) plan would be:
1. Purchase or cut billets.
2. Season for years. Yeah, I get that you aren’t going to do this initially, which is all the more reason to plan for the wood to move a significant amount during and after production.
3. Turn round (oversize)
4. Gun drill (under size)
5. Let rest for 6 mos or longer.
6. Ream to final I.D. dimensions.
7. Turn O.D. Closer to final to final dimension but not all the way.
8. Let rest another 6 mos - year, re-reaming every 2-3 months. I personally would want the wood to have been through one full cycle of all four seasons where I live in the N.E. USA. 6 months might be sufficient in areas with less drastic temperature and humidity changes, but I can’t say that from direct knowledge, as my woodwind making was all done here in New England.
9. Re-ream until the reamer isn’t removing additional wood from one 3 month period to the next.
10. Polish bore as needed.
10. Turn O.D. to final spec and continue production.
Seems time consuming and a lot of hassle, but if you want your whistles to stay straight and also not crack, you pay for that up front during production. Unfortunately most new makers rush the process and push out whistles (and flutes) that end up cracking and/or warping.
Point being, having and using reamers is quite handy, if you want to do things “right”. For cylindrical whistles you could probably find commercial reamers that would work for at least some of the whistles you’d make, no need to make your own to start.
-
Gerry1
- Posts: 87
- Joined: Mon Jan 14, 2002 6:00 pm
- Please enter the next number in sequence: 1
- Location: Moray, Scotland
Re: Making wooden whistles - a few questions
That's a fascinating take from two perspectives on the question of reaming. I'm going to look at that thread you've linked Geoffrey in great detail - thanks for that.
Loren - I agree with you on resting the tubes for a period of some months to make sure they're stable. Most of the exotic and domestic timbers we have will be kiln dried but acclimatizing them to domestic conditions takes some time after that process. This is something I've had to be careful of in my previous instrument building endeavours. My initial plan is to buy some of the woods in relative bulk and put them away until I get round to using them. I have a massive chunk of boxwood (castelo not european) that is going to be what I use to learn on - probably 20+ whistles worth and it has been seasoning for maybe 5 years in my house. I live in NE Scotland so it never gets very dry. It gets pretty damp in the winter and slightly less damp in a good summer! But household conditions are probably somewhat drier if not by a massive amount (I live in an old Victorian granite/sandstone house). I should get a moisture meter for timber but I suspect you have to spend a fair chunk to get decent accuracy.
Btw - feels like I'm getting a free masterclass in making woodwind instruments here! Thanks all!
Next question - been scaring myself looking at the price of silver sheet metal! How thick should I be looking at? Is 0.5mm enough? I can see the lathe is going to be handy for making other tools of use in shaping the rings to precise dimensions
-
paddler

- Posts: 752
- Joined: Sat Nov 03, 2007 7:19 pm
- antispam: No
- Please enter the next number in sequence: 8
- Location: Hood River, Oregon, USA
- Contact:
Re: Making wooden whistles - a few questions
Loren's advice on seasoning and explicitly addressing the inherent instability of wood is really important! It is not just a matter of having wood sitting around for years before using it. You should approach this as a multi-stage process, and anticipate that wood will move and needs time to settle after each and every stage.
I harvest, mill and season some of my own wood, which ultimately (after a ~10 year, multi-stage, process) ends up being cooked and then stabilized using vacuum resin infusion techniques. I turn to oversized cylinders and pilot drill (way under size) quite early in the seasoning process. I also acquired a stock of 40+ year old african blackwood that has been in this turned and pilot drilled state for decades. So I've had plenty of opportunity to observe the difference in movement patterns among parts made from these different materials and wood that has only been left to settle for a couple of years. I can attest to the message that all professional woodwind makers will tell you, which is that wood does in fact move ... a lot!
I've gun drilled many billets that are already pilot bored and have sat (and perhaps warped) in that state for long periods. With some, the pilot bore and final bore were close in size. I've never had a problem. In fact, I would say that the gun drilling goes even smoother and quicker and straighter in that mode. However, your gun drilling setup does have to take into account the fact that the air blasting through the drill will go straight through the billet, and as such there will not be the same pressure build-up to force chips back towards the gun drill. The way I manage chip collection, this is actually an advantage, because, like Terry, I have part of my dust collection sucking air through the headstock spindle, and hence assisting the compressed air running through the gun drill (in the case that the billet is pilot bored already). The result is that the process is almost completely clean, which is certainly not the case when gun drilling a solid billet, no matter how you try to trap the returning shotgun blast of chips. I've never experienced even a slight problem with chip clearing or jamming of the gun drill this way. But one safety issue you should always keep in mind with gun drilling is that if there is a problem with chip clearing, the drill will heat up very quickly and bind inside the billet. For the size of gun drills you are using, the result will most likely be that the head of the gun drill will snap off inside the billet. Expensive, and smelly, but not necessarily dangerous (or safe!).
I have also used a gun drill for hand reaming on a few occasions, where the gun drill was held in a vice and billet is twisted by hand to shave small amounts of material. Somewhat surprisingly (to me) it kind of works, in a pinch. Better than expected, in fact, but I doubt you'd want to do it to remove the amount of material you typically would remove when reaming. I've done the same thing with reamers to gently re-ream the bore of antique flutes, and it is clear that a reamer is a lot more effective than a gun drill in this usage pattern.
-
paddler
- Posts: 752
- Joined: Sat Nov 03, 2007 7:19 pm
- antispam: No
- Please enter the next number in sequence: 8
- Location: Hood River, Oregon, USA
- Contact:
Re: Making wooden whistles - a few questions
Oh, and regarding silver, if I were you, I would start by using nickel silver (german silver) or brass. It is much less expensive, and perfectly functional. The tools and techniques you use with it are just the same as with real silver, so you can always switch to the fancier material later when you have everything dialed in. You can also buy precision tubing in sizes such that it telescopes together, for use in tuning slides. You can also get it in sizes suitable for rings etc. People typically use a 0.5mm wall thickness, but antique instruments used a bit thinner that, and that may also offer acoustic advantages. I haven't found a source for nickel silver under 0.5 mm, but there are plenty of sources for brass tubing with thinner walls, and that might be the way to go for tuning slide. If you don't like the look of brass, you can always hide it under a very thin sleeve of wood over the outer slide. I do this on some of my flutes, for a more organic look. But note that I use stabilized wood for this thin veneer. This is a situation in which unstable wood can easily crack since the underlying metal will not move when the wood shrinks.
A good source of materials for you would be metalsmith.co.uk:
http://metalsmith.co.uk/metals-materials.htm
A good source of materials for you would be metalsmith.co.uk:
http://metalsmith.co.uk/metals-materials.htm
-
Gerry1
- Posts: 87
- Joined: Mon Jan 14, 2002 6:00 pm
- Please enter the next number in sequence: 1
- Location: Moray, Scotland
Re: Making wooden whistles - a few questions
Thanks Paddler for emphasising the point on resting the wood at different points in the process. I've taken that on board. Of course there's always Delrin or Ebonite! Or resin stabilised wood if one can find it big enough (for most of us who don't produce it like you!).
And of course if an instrument cracks it's not necessarily the maker's fault. People can and do treat musical instruments like the proverbial and if the wood cracks it's their doing. Not sure what sort of warranty should be offered that would be fair to both maker and customer. I'm only wanting to learn to make the beasties - haven't given much if any thought to actually selling them (it seems a long way off from this point).
I had tentatively thought brass for the tuning slide but nice shiny silver for the metal bits on show. Might be an idea to go all brass until I know what I'm doing. Actually thinking about it some of the tuning slide does usually show so maybe the brass/silver thing is a bad idea.
-
Geoffrey Ellis
- Posts: 585
- Joined: Thu Sep 13, 2012 1:15 pm
- antispam: No
- Please enter the next number in sequence: 8
- Tell us something.: Crafting fine quality folk flutes from around the world since 1997, my goal is to create beautiful instruments that have the best possible voice, tuning and response by mixing modern methods with traditional designs.
- Contact:
Re: Making wooden whistles - a few questions
I have used a gun drill as a reamer for very short sections on a couple of occasions. I wouldn't want to do it on anything really long because it's a bit hard on the sinews. Plus it is very slow. But I typically drill everything twice and I haven't found it necessary to re-ream. I turn my stock round and let it rest to get its wiggles out. Usually it moves a little bit, and might even bend slightly. Then I true up the OD again and watch to see if it moves any more. If it looks stable, I bore it out. Then I seal the bore with some thinned epoxy and let that cure in a heated curing cabinet. This does make it shrink slightly (depending upon the wood). Then I drill it again and turn the OD. At that point I haven't found that they shrink or move enough to matter, but I also tend to make flutes in a style where small dimensional changes are not going to have any negative (or perceivable) impact. When I'm making anything that is going to have a joint, a slide or multiple parts, then I use stabilized woods or ebonite, which is sort of cheatingLoren wrote: ↑Fri Dec 22, 2023 11:49 am I’ll offer a slightly different perspective with regards to reaming (or not) for wooden whistle making and say, “it depends”.
A good gun drill, properly used, CAN yield a very straight, smooth bore. OTH, there are a few ways things can go sideways, so to speak, leaving you with less than optimal results.
Also, keep in mind that if you gun drill the bore to its final diameter and then the wood moves - bending/ovaling - and it will move, then what are you going to do to get back to spec? You can’t gun drill it again, can you? I was taught not to try, so perhaps it’s possible but typically when I was told not to try something in the shop it was for safety reasons. I imagine you could try using the gun drill itself as a reamer and ream by hand, though I’m not sure how well that would work since I’ve never tried that either, as a proper reamer was always available. Geoffrey? Terry? Bueller? Ever tried hand reaming with a gun drill?
And though I wouldn't advise re-drilling a finished flute or whistle, it can be done. It is a somewhat dicey proposition, and one risks destroying the work. But I've re-drilled some long and thin-walled instruments successfully. Describing the method would be a big digression, but it involves 90 degree angle stock made from aluminum and a lot of duct tape
-
Geoffrey Ellis
- Posts: 585
- Joined: Thu Sep 13, 2012 1:15 pm
- antispam: No
- Please enter the next number in sequence: 8
- Tell us something.: Crafting fine quality folk flutes from around the world since 1997, my goal is to create beautiful instruments that have the best possible voice, tuning and response by mixing modern methods with traditional designs.
- Contact:
Re: Making wooden whistles - a few questions
Getting set up to do your own resin stabilizing is not too cumbersome, really. This is especially true if you are doing small stock. If you are looking to make high D whistles, then you only need to manage with very short sections of wood, and this means a smaller vacuum chamber, smaller quantities of resin, etc..Gerry1 wrote: ↑Fri Dec 22, 2023 3:28 pm Thanks Paddler for emphasising the point on resting the wood at different points in the process. I've taken that on board. Of course there's always Delrin or Ebonite! Or resin stabilised wood if one can find it big enough (for most of us who don't produce it like you!).
And of course if an instrument cracks it's not necessarily the maker's fault. People can and do treat musical instruments like the proverbial and if the wood cracks it's their doing. Not sure what sort of warranty should be offered that would be fair to both maker and customer. I'm only wanting to learn to make the beasties - haven't given much if any thought to actually selling them (it seems a long way off from this point).
I had tentatively thought brass for the tuning slide but nice shiny silver for the metal bits on show. Might be an idea to go all brass until I know what I'm doing. Actually thinking about it some of the tuning slide does usually show so maybe the brass/silver thing is a bad idea.
Paddler and Loren have both highlighted a major obstacle that I encountered along the way, and that is the necessity of using thoroughly settled timbers. This takes a lot of foresight and patience, and I've never managed it. I've been privy to paddler's process with this over the last ten years and it is beyond impressive--he has stockpiled an envy-inducing collection of flute timbers, committing to the time and effort needed to process it through various stages and then to let it settle properly. I've seen photos of his wood collection, and it makes me drool a bit
The dilemma I faced (and the reason I rely on resin-stabilized wood or ebonite) is because I couldn't realistically pull this off because I've chosen to make too wide a variety of flutes. If I focused on a single type then the task of sizing and preparing suitable stock would be, if not easy, then at least manageable. But to provide for all of the different types of flutes I'd have to have a ludicrous quantity of woods in all of the various stages of the process--I couldn't afford that much material nor could I store it (it would need a small warehouse to accommodate it). But if you focus on a single type of instrument with limited variations in size, you can store a lot of "resting" stock.
But on the subject of reaming, I had meant to comment further on the reaming versus drilling piece. I have bought and used some straight reamers, which was easier than making my own, and frankly they were better. But I've also manufactured my own for special jobs. The argument for re-reaming versus re-drilling is perhaps that it is safer, less likely to cause problems with stock whose OD has been turned near to its finished size. When you get thin-walled stock you risk rupturing it when you attempt to re-ream it (or drill it). Stock with a thicker wall, such as you'd find on a conical bore flute or a recorder, will bear the process better, especially if you have nice, sharp reamers and you go slow and easy. But I have not found reamers to be any more delicate than a gun drill when you are dealing with thin-walled stock. You face the same dangers. Thin-walled wooden tubes flex a lot when something like a drill or reamer are traveling through them--you can really feel it if you are holding the stock and feeding it onto the reamer or drill. I have cracked my share of thin-walled stock doing this very thing, both with reamers and drills. Usually this is the result of impatience--moving too quickly, and not taking enough trouble to support the stock from the outside. And I think this is the advantage of a reamer--you can choose to go very, very slow if needed. Especially if you have a way to manually turn the reamer, as opposed to having the reamer mounted in a lathe chuck where you can only set the speed to go so slow (unless you have a lathe with a variable frequency drive or the like).
My own gun-drilling set up has such a drive, so I can run it with infinite variations in the speed between 0 and 1200 RPMs. So if I choose to re-drill something, I can go at 10 RPMs if necessary. Typically when re-drilling I haven't needed to go slower than around 100 RPMs. But the trick is finding a way to support the thin-walled stock from the outside. I've gone as far as wrapping the stock duct tape to prevent marring and then putting hose clamps along it's entire length. Like a corset for the hollow tube. This is a huge pain in the neck, but surprisingly effective in preventing rupture of the thin walls.
But I can understand why re-drilling was discouraged, Loren. I've had some longer stock blow apart during the attempt, and fling pieces of shattered wood. I've never been standing near enough to feel like I was in danger (my drilling rig obliges me to stand about five feet behind the stock in order to feed the drill), but if I were standing right over the turning stock I think this would be highly alarming! But re-drilling, as with re-reaming, is not really problematic if the wall thickness is sufficient.
-
chas

- Posts: 7703
- Joined: Wed Oct 10, 2001 6:00 pm
- antispam: No
- Please enter the next number in sequence: 10
- Location: East Coast US
Re: Making wooden whistles - a few questions
I'm a little late to the party, but here's my 2 cents.
I have a 9x20 JET metalworking lathe to make fittings, cut slides, and to turn the tube to just about the final OD. I do smooth things out with a straight chisel on the wood lathe and do just a bit of sanding.
The lathe weighs about 250 lb/110 kg. With me taking the motor end and my petite wife the bed end, we were able to lift it onto the table I made for it from 80/20. (The table was a great move. Pricey but does exactly what I need.)
I have a JET wood mini lathe with bed extension for ruffing and drilling. I don't drill undersized as Loren suggests (although that would be better). I ruff very oversized once. I store the ruffed blanks in the garage and do a second ruffing and the first drilling in the summer, when it's humid as all getout in the US Mid-Atlantic. I wet the inside of the bore at this point and store them in the basement. I do the second drilling in the winter when the humidity in our basement is in the 30% range. The bore is a tenth to a few tenths of a mm smaller at this point, so unless there's a ridiculous warp, the second drilling straightens things out and burnishes the bore.
One suggestion: If you're turning wood on the metalworking lathe, I'd recommend taking all the grease off the bed, the lead screw, and anything else that might get sawdust on it. (Definitely keep the parts inside the apron greased.) I use was on the exposed parts, which works just fine (be attentive to both the waxing and greasing) and wood chips don't stick to it at all, and sawdust damn little. I always do a detailed cleaning to get rid of all sawdust when switching from wood to metalworking and make enough metal parts for 4-5 batches of whistles at once. Then another cleaning to get rid of all the cutting oil before switching back to wood.
Charlie
Whorfin Woods
"Our work puts heavy metal where it belongs -- as a music genre and not a pollutant in drinking water." -- Prof Ali Miserez.
Whorfin Woods
"Our work puts heavy metal where it belongs -- as a music genre and not a pollutant in drinking water." -- Prof Ali Miserez.
-
Gerry1
- Posts: 87
- Joined: Mon Jan 14, 2002 6:00 pm
- Please enter the next number in sequence: 1
- Location: Moray, Scotland
Re: Making wooden whistles - a few questions
This statement Geoffrey sent me off down a rabbit hole in the last few days! It does look a simple process once you have acquired a few key items. And it does seem to address some of the issues of timber seasoning referred to in this thread. I wonder if you have tried making an instrument from the combination of wood and epoxy resin I see in fancy knife handles etc. I can see some creative possibilities there and if we're making instruments from Delrin then why not epoxy?Geoffrey Ellis wrote: ↑Sat Dec 23, 2023 7:47 amGetting set up to do your own resin stabilizing is not too cumbersome, really. This is especially true if you are doing small stock. If you are looking to make high D whistles, then you only need to manage with very short sections of wood, and this means a smaller vacuum chamber, smaller quantities of resin, etc..
That's a really good tip Charlie thanks. I can imagine wood shavings and sawdust don't play too well with all of the moving parts of a metal working lathe. The good news is I also keep bees so I have lots of (too much!) beeswax on hand!chas wrote: ↑Sun Dec 24, 2023 11:11 am
One suggestion: If you're turning wood on the metalworking lathe, I'd recommend taking all the grease off the bed, the lead screw, and anything else that might get sawdust on it. (Definitely keep the parts inside the apron greased.) I use was on the exposed parts, which works just fine (be attentive to both the waxing and greasing) and wood chips don't stick to it at all, and sawdust damn little. I always do a detailed cleaning to get rid of all sawdust when switching from wood to metalworking and make enough metal parts for 4-5 batches of whistles at once. Then another cleaning to get rid of all the cutting oil before switching back to wood.
-
David Cooper

- Posts: 149
- Joined: Thu Mar 10, 2022 5:24 pm
- antispam: No
- Please enter the next number in sequence: 8
- Tell us something.: I'm about to have a go at making wooden flutes based on a quena - I want to experiment with changing the hole sizes and locations to make one that's more comfortable to play. I just received an auger through the post today, and there are blown-down trees in the garden waiting to be repurposed, so I'll try to make a start on my first prototype at the weekend.
Re: Making wooden whistles - a few questions
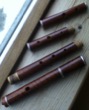
Why not, indeed. I learned from Geoffrey to coat the bore of my wooden flutes with epoxy to get a good tone out of them instead of having high energy loss to the not-very-dense hardwood (birch) that I was using. This is a low-maintenance alternative to using oil to fill up all the microscopic air pockets and make the wood behave as if it's denser. I then took this a stage further by experimenting with flutes (Andean ones) made solely out of epoxy (a brand called Craft Resin which is food-safe). They sink in water as they have the density of tropical hardwood, but it's only really the rigidity of a thin layer of the bore that counts for creating good tone.
If you want to make great instruments at low cost with minimal tooling, resin is a good way to do it. I actually made one quenilla (Andean flute in high C) using just an 8cm silicone bore mould rotated by a motor (8 revolutions per minute), taking five goes to get the instrument up to length by pouring liquid resin onto it and keeping the motor running for eight hours until it set hard, then the next day I'd move it along the mould with only 1cm of it left on it and add another 6cm onto the end of that. From then on I was able to rotate the resulting 30cm tube on its own to fatten it up with more layers of resin. I normally use a full length bore mould though - the short one was just a fun experiment using up some old silicone rubber solution while I was waiting for a deal price on another batch.
Flutes that look like glass are not attractive once they're full of condensation, so I now embed holographic film under the surface, or mirror foil with alcohol ink in the next layer of resin on top to give them a metallic look, but it takes a lot of work to discover ways of doing this neatly, not least because there can be delamination issues due to epoxy not bonding well to such films, so when you drill holes through them you can get ugly air patches spreading around them. I'm going to experiment with metallic silver paint next as an alternative to mirror foil, but you can get foil to work, and I want to give ESR mirror film a go as it reflects 99% of the light that hits it instead of the more normal 70%, but it's extremely expensive.